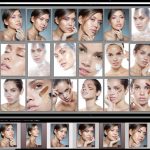
My Beauty Retouching Workflow: Before Retouching Even Begins
This is Part 1 in a series of articles dedicated to my personal Beauty Retouching Workflow, developed over many years. Although I continue to evolve and modify it, the main direction and its structure remains the same. You can find part 2 of this series here and part 3 here.
WHAT IT TAKES TO MASTER RETOUCHING
In photography and retouching, as in most artistic endeavors, there are always dozens of ways to get from point A to point B. And yet, even with plenty of practice, you can’t expect to achieve brilliance simply by learning the basics. After all, it’s rather unrealistic to expect to play Chopin’s 2nd Sonata as well as Chopin himself just because you can read music.
Over the years, I have learned that true progression is not so much about an artist’s tools or techniques; rather, it’s about developing visual taste, aesthetic judgment and a trained eye.
Once you gain a good understanding of how to use the basic retouching tools and learn some advanced techniques, continue practicing like a maniac, learning new techniques, and testing new approaches to refine your workflow.
Keep what works for you, and ditch what doesn’t – over the years you will fine-tune your workflow and that will allow you to produce consistent, top quality results every time your stylus touches the tablet.
Generally speaking, technical prerequisites for successful beauty, portrait, and fashion retouching include great understanding of:
- software of your choice (Photoshop, Lightroom or Capture One, etc),
- human anatomy;
- how to render light and shadow in two-dimensional art;
- color theory.
Regularly examine strong, technically correct images, whether they are photographs or paintings, to help train your eye to see visual balance, pleasing colors, and overall composition. The rest will come with a lot of practice.
BEFORE YOU BEGIN
If you are a photographer who wants to become better at retouching I would suggest shifting your learning emphasis to lighting, composition, and everything else that goes into capturing great images before you spend more time trying to master retouching.
If you have already mastered your lighting and photography skills, you’re ready to dig deeper into learning how to retouch.
As a professional photographer, I can leverage well captured Raw files in my retouching to ensure great quality of the end product. My philosophy is, “Get things right in camera,” and I invest a lot of time and energy during pre-production for my photo shoots to minimize the number of corrections I will have to make later in post.
Long gone is the mindset of “I’ll just fix it later in Photoshop”, and if you make a living by shooting for clients, I strongly encourage you to put as much thought and preparation into your shoots as well.
Mistakes that require corrections in post-production will still happen, but you can minimize them significantly if you work to avoid them from the outset.
If you are a beginner retoucher and don’t have the option to improve your working material, you should always start by assessing the quality of the files you receive from your client. Keep in mind that although Raw files can provide great flexibility when it comes to retouching, there are limits.

Lissy of Osbrink Models, Makeup by Lupe Moreno, Hair by Savannah Calderon, Photo & Post by Julia Kuzmenko
For example, you may not be able to fix any parts or details of an image that are substantially out of focus or underexposed. Don’t rush to commit to an assignment if the Raw files are low-quality because the outcome, no matter how good your retouching skills are, may not meet the level of quality your client expects (perhaps unrealistically) or reflect your actual proficiency.
Discuss your concerns and don’t be afraid to educate your client – there may be a simple solution, such as a similar photo from the shoot, or an additional photo from which you can graft the necessary parts.
– – –
In the next article I will talk about how I prep my Raw files for retouching in a Raw converter of my choice – Adobe Lightroom. I will also share the reasons why I stick with Lightroom, as it fits my workflow perfectly in so many ways.
This is an updated version of my article that initially appeared in the first issue of [RE]TOUCHED Magazine, with the help of our Editor-in-Chief Philip Sydow.
Beauty Retouching Workflow Checklist

A free PDF checklist for those who strive to be a better Beauty Retoucher
Hi Julia,
Did you ever post the follow up article for how you prep your raw files for retouching in Lightroom?
Hi Jane,
Not yet, but I am trying to squeeze in another post into my schedule each week, so I can cover more topics. I will soon! 🙂
can you help me ?
i want start o retouch,but i have’t any raw file