
Industry Insider: The Art of Flawless Skin – Part I: Photography
On the subject of beauty photography and retouching, one of the first aspects that comes to mind is flawless skin. The core of most beauty work is the art of conveying perfection. While few complexions are naturally perfect, it is an illusion that becomes important to create this fantasy for the viewer.
This doesn’t mean every image needs to be the same or that all photos require the same process for skin; everyone has a different view of what ‘perfect’ is. It does mean you’ll need to know the tools at your disposal in order to create what you view as perfection and have a good grasp on the different options of skin presentation in beauty work.
Flawless skin seems relatively straightforward on the surface, simply make the skin even. But when you’re looking at an image as a whole it can become more complex than that and certain stylistic choices in makeup, photography, and retouching can have a great impact to your final image. Before we jump ahead too far there are some basic practices that are nearly universal for beauty images.
PREPARATION
Working with your model ahead of time can be a huge time saver for post work later. While makeup and retouching can fix a lot of issues, it’s good to start with the best canvas you can as opposed to trying to fix problems later.
In terms of skin care, a lot can be attributed to overall healthy practices. There aren’t any miracle creams models can put on the morning of a shoot to look fresh-faced.
That’s the mantra your model should try to adhere to before a photoshoot; keeping your face clean and moisturized and getting plenty of water, rest, and shade.
The goal is to achieve that lovely ‘beauty sleep’ appearance and avoid dry, flaky skin or chapped lips, which can be hard to correct in post. Not to mention a model that’s followed these guidelines before a shoot will probably be a bit perkier than if they show up with a hangover or a sunburn.
Aside from these habits, it can sometimes depend on the specific shoot and model. I personally have a lot of peach fuzz on my face and it would be a chore to fix in macro shot.
Respectfully addressing an issue like this beforehand can save a lot of trouble later.
Comparatively, I’ve had shoots where I know this wasn’t a concern for the intended project or model. Along the same lines, in winter I make it a point to tell models to diligently use lip balm or even hand lotion in the days leading up to a shoot. In summer it’s not something that’s usually a big concern.
Keeping moisturizer on hand for models with dry skin and blotting sheets for oily skin is also a good habit to develop.
Considering who and what you’re shooting and what issues can arise because of outside factors can help you prepare.
It goes without saying, be polite to your models when asking them to care for their skin. No matter how flawless skin looks in person, beauty photography can be ruthless.
Everyone has a small bit of peach fuzz, blackheads or dry skin but only models are put in such a position where we look over their complexion in all its natural glory at 20-50 megapixels.
DEWY VS. MATTE
In the image below you can see a familiar example of how matte skin looks in a lot of beauty work; clean and soft without any dramatic flair. It can be a great base for classic makeup as well as more glamorous and creative looks. It also helps the skin take a background role in the image so the focus can be directed towards the makeup, hair or accessories if necessary.
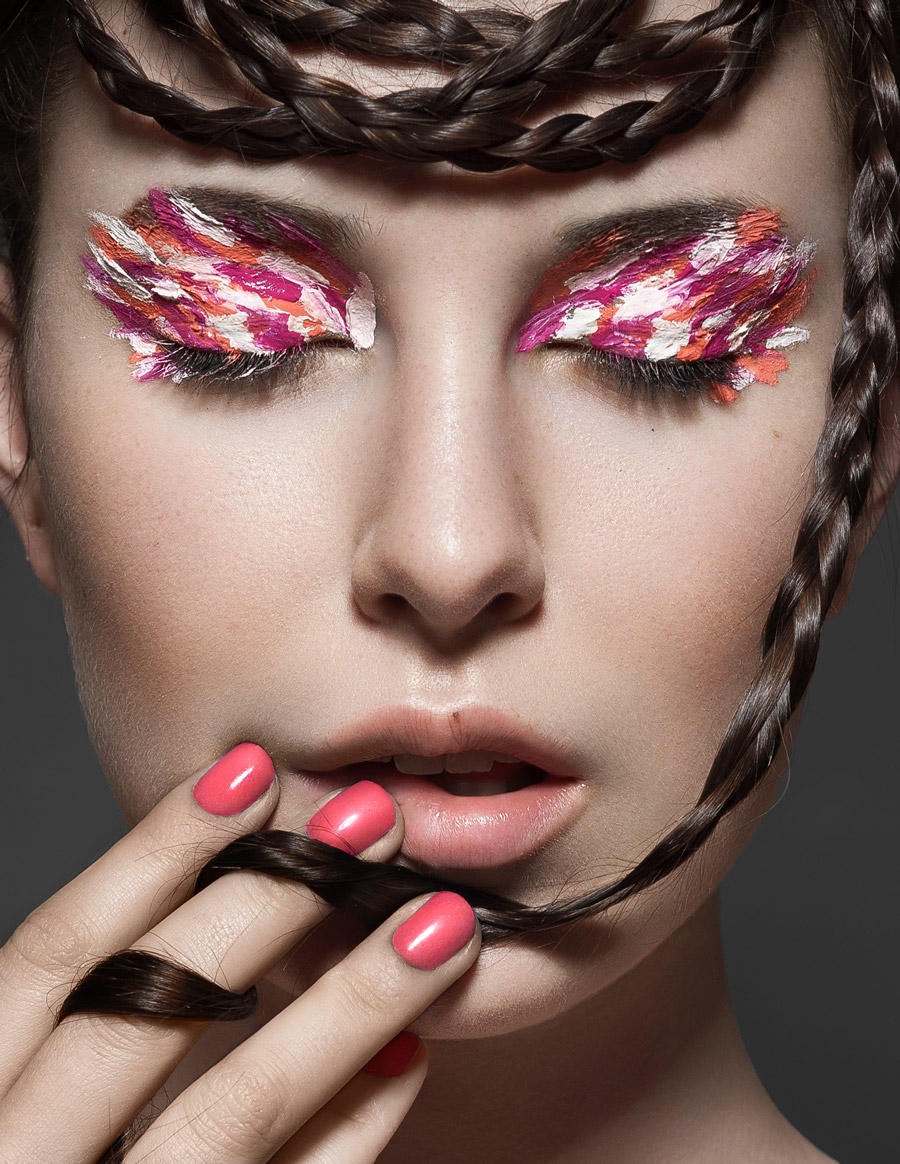
Matte Skin. Image by Laura Bello
In the second image, you can see an example of glossy, dewy skin. There are varying levels you can go to with this look, to the point where a model looks nearly greasy, but all add the same effect.
It creates a lovely sheen with bright highlights and often compliments wet hair. It can also be an effective way to convey different themes in an image. In this particular one it makes the shot look more summery and warm; it’s a very simple way to create a different feel and to add a bit of extra allure to the skin.
That being said, there can be too much of a good thing. Adding gloss to an otherwise elaborately styled model can make things too busy.
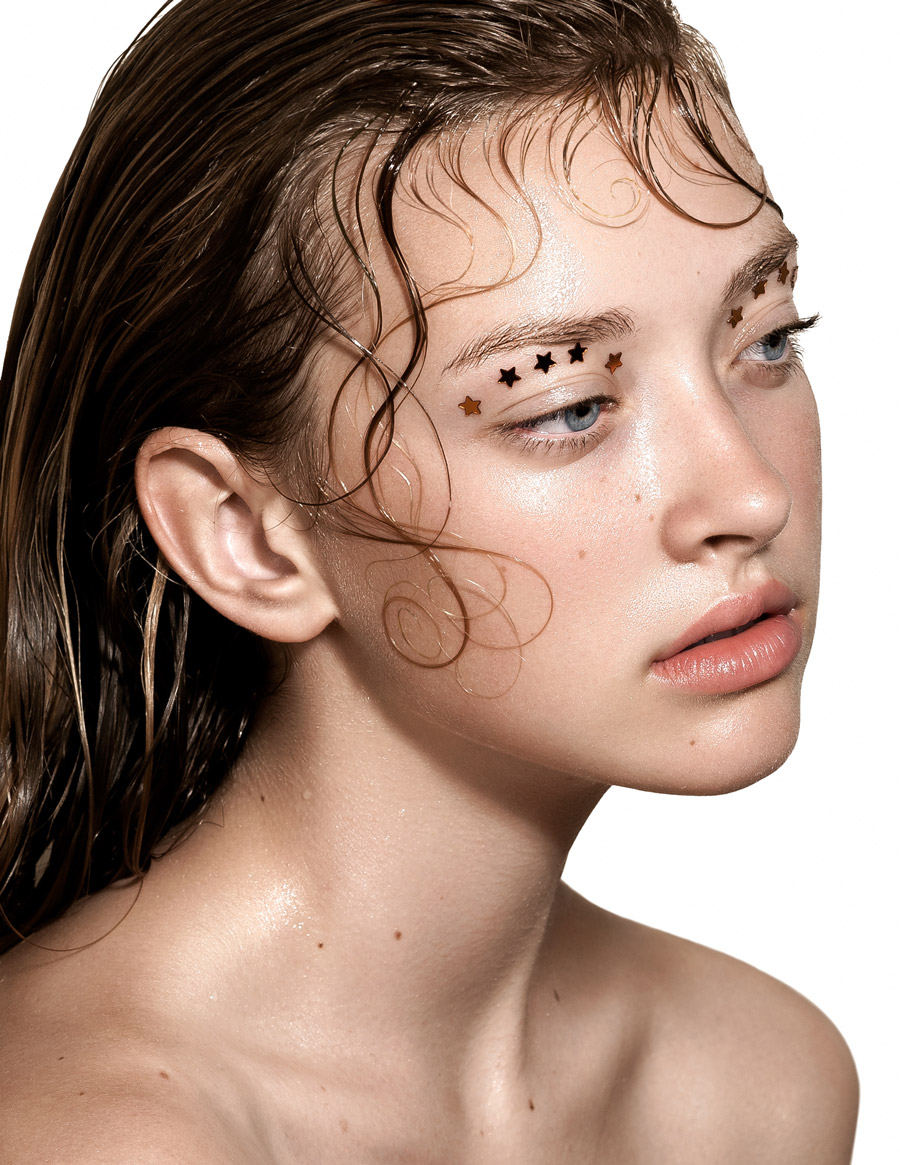
Glossy Skin. Image by Laura Bello
This may sound crazy, but I don’t use foundation in a lot of my photoshoots, especially my portrait work. It can look heavy and create a cakey look on the skin, which can be very difficult to fix in post. I’m not saying shun your makeup artist since a good one will know how to best bring out natural skin as well as provide more glam makeup when required.
However, consider going bare if you’re looking for a more natural look during a test or portrait shoot, especially if you want to highlight a model’s freckles!
Outside of these general concepts, working with skilled makeup artists will make your life easier. Find someone that not only knows how to create a lovely complexion, but can solve problems and help support you on concepts you’re creating. Photography really is a team effort and trying to do everything yourself can lessen the quality of your work.
The phrase ‘jack of all trades, master of none’ applies perfectly to beauty photography. There’s a lot of different components involved in the final image and having a team that focuses on each aspect results in all those areas being done to their highest potential.
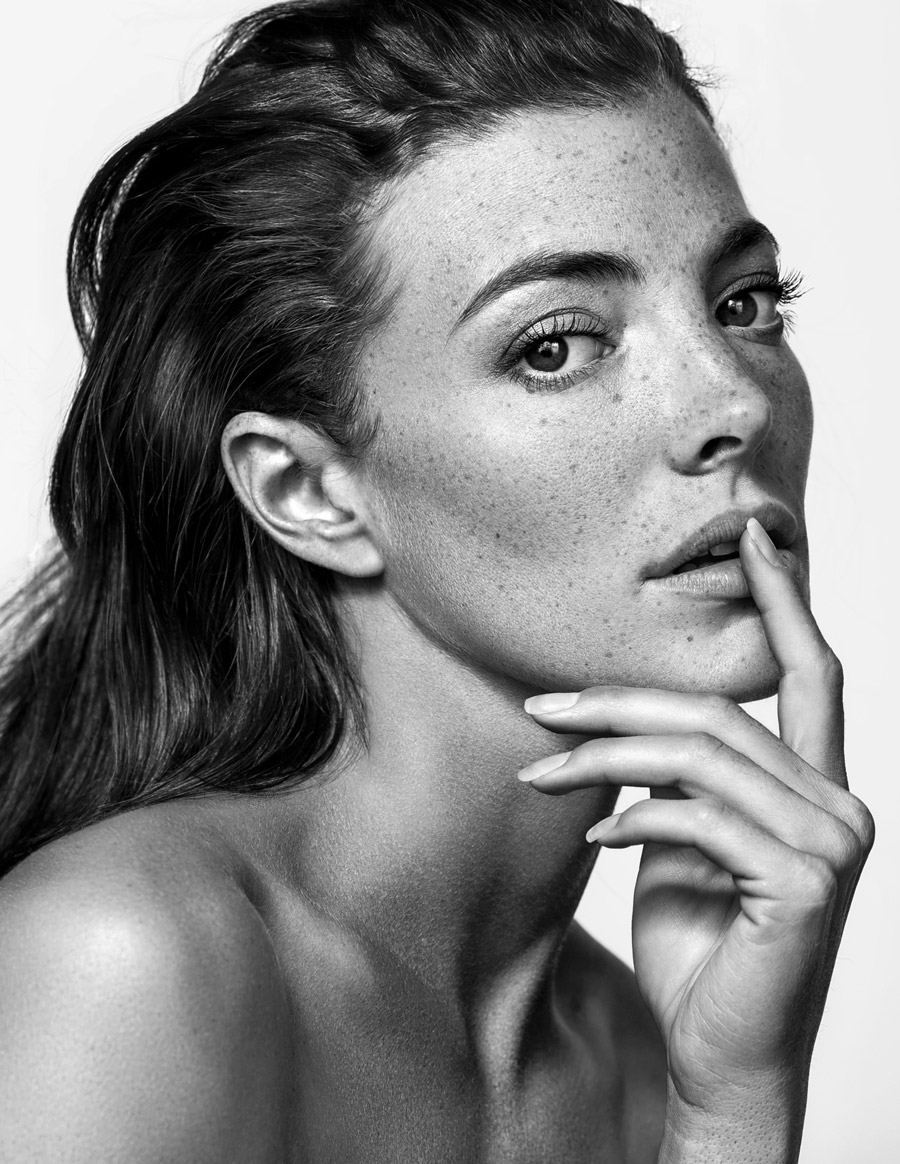
Natural Skin. Image by Laura Bello
LIGHTING
When it comes to lighting and skin there’s an episode of Seinfeld that always comes to mind. Jerry meets a beautiful woman at a party and asks her out to dinner. When she shows up the next night, to Jerry’s shock, she looks utterly haggard. Discussing how she’s puzzlingly attractive one day and not the next, George dubs her ‘a two-face’.
Despite it being used as a joke, bad lighting really can make someone beautiful look terrible. In addition, how you shoot skin can affect not only how it looks but also the amount of post work necessary. Using harsher light will create skin with more specular highlights and dramatic contrast compared to the softer, matte look of a larger, closer light source.
Beauty dishes and direct sunlight for example tend to be on the harsh side while natural window light and large light modifiers are softer.
Lighting examples: flattering and unflattering. Images by Laura Bello.
Light placed at dramatic angles can create harsh shadows in unflattering places and can be very unforgiving, especially to those that aren’t blessed with an amazing complexion. It can be helpful if you’re still learning how to create perfect skin for beauty images to avoid this type of light since it can mean more intensive retouching and requires a really strong model.
Lighting examples. Images by Laura Bello.
Fill lights can help counteract harsh shadows and contrast, which is why clamshell lighting is a staple for beauty work. One of my personal staples is bounced light, which can create a soft and natural effect that’s very flattering.
While all types of different lighting can create beautiful skin and dramatic images, as a general rule it helps to watch the catch lights in the model’s eye for guidance.
Keeping the catch lights as close as you can to the top of the eye helps create pleasing, contrasting lighting; getting higher can result in ‘raccoon’ shadows on the eyes and result in that overall haggard look.
Replicating loop or butterfly lighting is a very straightforward way to well-lit skin and is a standard technique in lots of beauty work.
Loop lighting is one of the most popular lighting techniques due to its simplicity and suitability to almost all types of subject. The name ‘loop‘ comes from the appearance of the shadow this type of lightingcreates under the subject’s nose, shaped like a loop.
Lighting examples. Images by Laura Bello.
This can all be a lot to keep in mind while shooting but try to remember this: if the lighting isn’t complimenting the model in the photo, you should try to change it up as it isn’t something that can be fixed in post. Slow down, take your time and keep it simple. If you’re still unsure, make an effort to get the same shots with slightly different set ups. When you go to look through your set later, you’ll not only have more options, but can learn to compare the pros and cons of different lighting.
RETOUCHING
Speaking of post work, beauty images truly depend on quality retouching marked by attention to detail. While I’ve often been asked how I retouch skin, it’s a hard question to answer.
Not every image needs the same process in post and it’s often more helpful to know how to use the tools available to you and what your final image should look like then trying to follow a list of instructions for every image.
On that note, let’s talk about reference and inspiration while retouching.
I actually think that retouching is very similar to drawing or painting, the only difference is that you have a base image to start with. Being skilled at retouching isn’t only about technique but having the right vision.
Similar to drawing, it can be very helpful early on to regularly study reference images and before and after comparisons by other skilled artists while working and in your free time. This gives you an idea of how the face should be sculpted and what should or shouldn’t be touched up in conjunction with studying how to go about it. Even with good skills it can be easy to overdo it (or under do it) if you’re not familiar with how the final project should look.
When it comes to the finished image, there’s not a one-size-fits-all for every retoucher or even every image. When it comes to skin though, the biggest difference is natural verses polished.
Natural looking skin goes well with natural looking portrait work, while more polished work fits well with refined beauty images. Like everything in art there are no strict rules, knowing that both these styles are an option opens up more possibilities.

Lighting examples. Images by Laura Bello.
In these first two images you can see how smooth and even the skin is and the overall shape looks very sculpted and perfected. Comparatively, the second set of images has more skin texture and small variations throughout the face. It’s simply a less perfect version of perfection and is actually the style I’ve been moving towards recently.
Like other artistic mediums, artists can have their own personal retouching style whether it’s natural, polished or a mix of both.
With all of this cleared up, let’s talk about how to actually do the retouching work.
Read the second part of my article, in which I share the main steps of my retouching workflow:
Industry Insider: The Art of Flawless Skin – Part II: Retouching


wow !! thats one of the interesting blog on
image editing
In Beauty photography working with the model before photography is very effective for saving time on post production. Although without retouching we will not get the perfect result. So a little drawing and painting is also important too. Thanks for sharing this nice article.
This piece does a great job showing that flawless skin starts long before Photoshop, from thoughtful prep to lighting choices that respect natural texture. I appreciated the balance between matte and dewy looks and how each supports a different creative direction instead of chasing one “perfect” formula. That mindset carries into retouching too, where restraint and vision matter more than heavy smoothing, something we focus on daily at Clipping Expert Asia when refining beauty images. It’s a solid reminder that teamwork and intention shape truly polished results.
Clipping Expert Asia
Thanks for providing such a tutorial.
Thank you for your wonderful tutorial.