
My Beauty Retouching Workflow: Before Retouching Even Begins – Part III
In the first part of this series, I wrote about the things that I am convinced are very important to for all creative professionals in the visual arts.
In the second part I talked about my organization and rating system, which may seem like an unimportant part of a retouching workflow, but the truth is, most likely it’s not your best images that the world ends up seeing it you don’t have a proper rating, comparing and selection process in place.
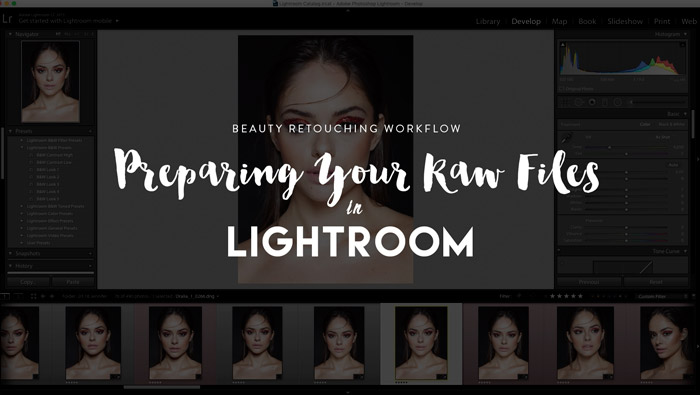
Today, I want to share with you how I prepare my Raw files for retouching: Get The Best Out of Your Raw Files Before Retouching
Recommended Posts

Showing 31 comments


This was wonderful! Thanks so much for taking the time to share!
Thank you John! And it’s my pleasure 🙂
I Believe in people like you. Thank you for taking the time out and explaining your process. One question what makes you not use capture one pro? Have you used it and does it really matter in a commercial setting.
Thank you Manuel! I did try it in 2013 and again in 2015 the newer version, but my LR process is so convenient and improved, that it makes no sense for me to change it for something that will ultimately give me the same results, only will slow me down as it’s a new software for me. I think it’s the vision and knowing what you need what matters, not what software you use to get that very result.
I can see your point and understand. Lightroom has a better organization system that makes me want to just use it over capture one but capture one I feel is more non- destructive on some pictures.
Yes, being able to organize and catalog images is definitely better, but I don’t quite understand what you mean by implying it is less non-destuctive – Lightroom is absolutely non-destructive, it doesn’t do anything to your files, all your tweaks and adjustments are saved in separate files.
Very helpful article and video. Interesting to hear your take on the Shadows/Highlights, Whites/Blacks sliders. I thought I understood them before, but you definitely added more insight for how to maximize what you get from the RAW file. Thanks for being such a helpful, positive force for retouchers!
It’s my pleasure, Lona, I’m happy it is helpful 🙂
You are a genius, I love you!
lol, thank you, I love you too!
Im so glad I found your articles and videos! Thank you!
Thank you Charlie 🙂
Thank you!
Thank you!
Thank you!
🙂
I have to thank you for this article and video. I’ve been trying to change to Capture One as every is saying it so much better, but my computer is extremely slow when rendering the previews etc. I feel your work is amazing and if you can these results in Lightroom I might just stay with Lightroom. Thanks.
Hello Julia,
I’m a little fan of your great work with color! Yet for years I struggle with one weird problem that I’ve got quite often in my works – problem with RED channel in skin tones (using Canon 5d Mk II or IV) – to a level I can’t really quite correct it to the way it looks nice. It might be same light situation, same location, but usually different model. Can you share you thoughts about this particular problem? Have you ever got something similar? Maybe you figured out what causing it, or how to fight it (it makes me cry every time I see it). Is this related to a particular skin tones of a person? Or a wrong light? Or…
Thank you for any response, I love your work :*
Bests,
Pawel
Ohh and of course I do have fully calibrated workflow – from Camera calibration using X-Rite passport, trough good monitor that I calibrate using spyder. And It’s not always the case that this Red channel is bad, just sometimes (?)
Thank you Pawel!
I really have no idea what you mean, so I can’t really help.
Maybe share a couple of examples of what you mean when you say “a problem with red channel”.
Here are two examples I recently made with same camera, same lens, same flash units, almost the same light setup (with different power), in different places and with different model. I name it “problem with red” but I might be in fact wrong, maybe it’s orange? Maybe it’s yellow? Generally speaking on second image skin tones are look good to me and I can work with them, on a first image whatever I do with color sliders – skin look washed out (if I remove saturation) or too redish/orange (?) I’m talking about skin color, because there are few other things I’m not quite satisfied about color (like background) – but that I can change in PS without a problem. Problem is only skin tones 🙁 Thank you in advance for any help :*
Bad skin color: https://drive.google.com/open?id=0B-NGFuLTiazAWmtXZkE2RzlOUjQ
Good skin color: https://drive.google.com/open?id=0B-NGFuLTiazAM3JZVFk4WFRjcFE
I still don’t see anything out of the ordinary, definitely no technical issues here.
Each human being has a different skin tone. Some are more pale, some have summer tan leftovers, and etc.
You also have an orangy fur thing next to the model’s neck and it may contaminate her skin tone on the neck. But overall, you can’t call “good” or “bad” skin color just because these women’s skin photographed differently. That’s what post-production is for – if someone’s skin tone does not look pleasing to you in the SOOC image.
Thank you very much for detailed explanation 🙂 Seems I need some more practice with lightning then uh, thank you again for your time Julia <3 <3
There are also such nuances that will affect the look of the skin as you described “whatever I do with color sliders – skin look washed out “:
– the model’s skin qualities + makeup (more or less highlights)
– the distance between the model’s face and the light source
– the direction of the light in relation to the face and camera (the way light illuminates the face in relation to the camera)
Check out my article on this: http://masterbeautyphotography.com/lighting-lesson-how-to-use-contrast-of-light-to-photograph-beautiful-skin/
Love your work and tutorials Julia. I was wondering why create so many moves for selective areas in LR when you can still work non destructively on a Smart Object (RAW) in PS with adjustment layers ?
Thanks Daniel!
There’s more than one way to skin a cat. I can’t really give you a good answer to this because I never go the smart object route, so I can’t fully compare. I do, however, know that once I retouched the first image from a shoot, my Virtual Copies stay in LR and when I get down to the next few images from the same set, I simply sync all of the settings for each of the Virtual Copies for every shot that I do after the first one. This saves me a ton of time and helps me ensure all of my images from the same set look cohesive. Is that as easy to achieve via the Smart Object way?
Thanks for the quick reply. I have so many questions but don’t want to derail from this topic. In short yes, because all of the adjustment layers you are using for the lips, eyes, cheeks, etc can be copied to your next image. The only thing that needs to be done is the masks need to be redrawn for the geometry. I agree with the 6 of 1 or 1/2 dozen of another reference. And by no means am I trying to find holes in your workflow, I actually understand and appreciate it. Regarding LR thou, I have heard from many that C1 is far superior in Raw conversions and that was my next question. I fear its because you have such a mature workflow in LR you don’t want to relearn it.
Sure, no I won’t argue that my workflow is better than any other, be it C1 or Camera Raw, it just has been working too well for me. I have tried to transition to C1 twice in the past 3 years, but came back running every time. I am just too efficient with my current workflow and I don’t have any downtime to re-learn or transform it, just so I can be like everyone else who promotes C1. It can be the industry standard, for all I care, but I have been doing well with my good old LR. I am actually a perpetual student, and I’m always trying to find better ways, but I gave C1 two honest tries and it just didn’t work as well for me.
For me its not about promotion, its about what renders you the best result. Obviously what you are doing works, your images are proof of that. Looking forward to learning more from your blog and expertise, both in Shooting and Post work. I’m especially interested in your lighting set ups and modifier choices. Do you have a video tut on that ? For what its worth, I use LR as well.
I absolutely agree with you on that! I have seen some amazing digital paintings created with the freeware called GIMP. It’s the visual taste and a trained eye what matters – and any software will help you get to the desired result. As for the lighting setups – Go Pro: Studio Beauty is a whole course on that, you can find it in the Products widget right below. Or via the Shop in the menu.
regarding your actions panel, may i ask what the glowing skin, magical skin , remove body and facial hair and luminosity masks action has in it ? aren’t they directing related to the source ? Meaning if the magical skin is a set of adjustment layers, isn’t it relative to the raw source ? Never thought this or other actions as turn key. In addition how are the lum masks being generated ? Thru Calculations ? Apply Image ?
Thanks.
Hi Daniel, you can read about all our scripts here: https://retouchingacademylab.com/faq-beauty-retouch-buttons-scripts/ and there’s also a detailed User Manual that comes with the panel, which explains how to use each button.
Wow, that was actually really informative. I purchased the dodge and burn and color grade practice this article went really well with all of it. Thanks so much. Love your work!
Hi Julia, thanks a lot for this tips! Do you use a particular profile for your picture in Lightroom (Like “Camera Standard” or other profile)? Which kind of profile is better for beauty retouching?